UBlox GPS 配置
本文将介绍如何连接到 u-center 以更改配置。 3DR uBlox 模块。预计普通用户不需要这样做。

连接方案 #1 - Mission Planner地面站和 Pixhawk 作为直通器
任务计划程序和 pixhawk 可以通过以下方式传递 u-center 和 GPS 之间的通信:
将 Pixhawk 与个人电脑连接,并与Mission Planner地面站连接
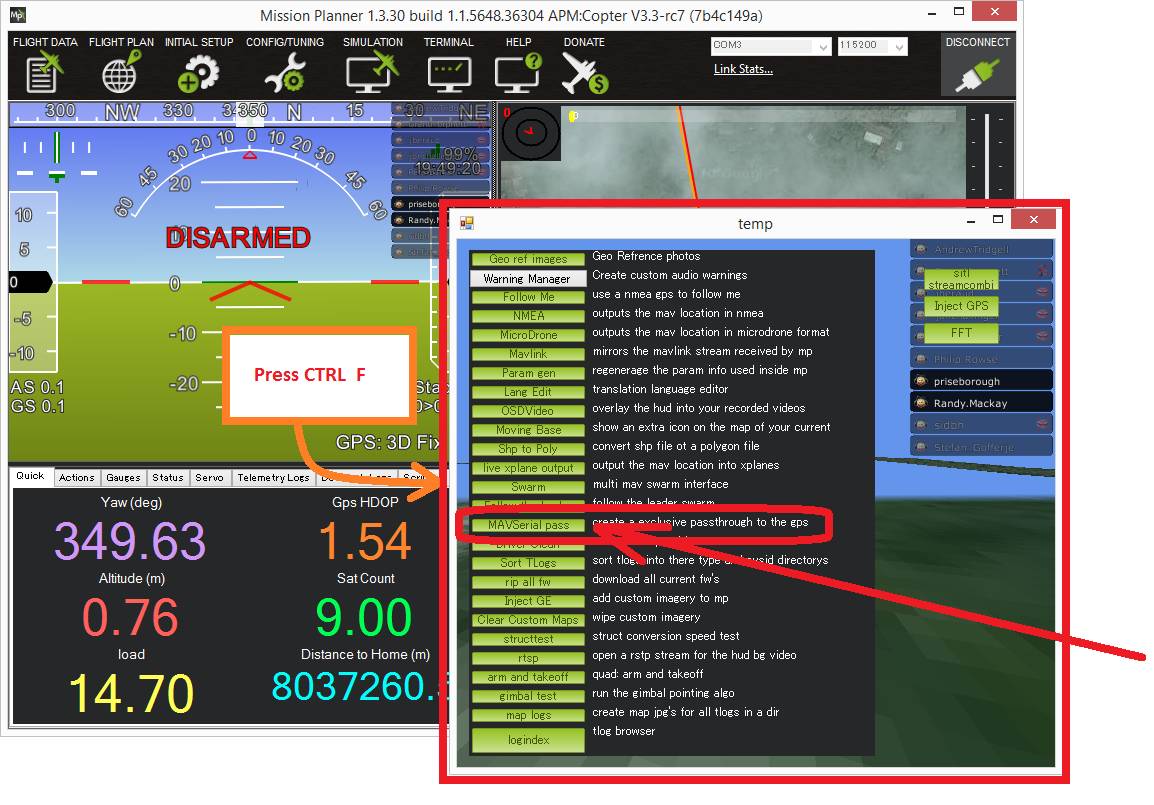
在 "飞行数据 "屏幕上按 Ctrl-F,然后选择 "MAVSerial pass"。
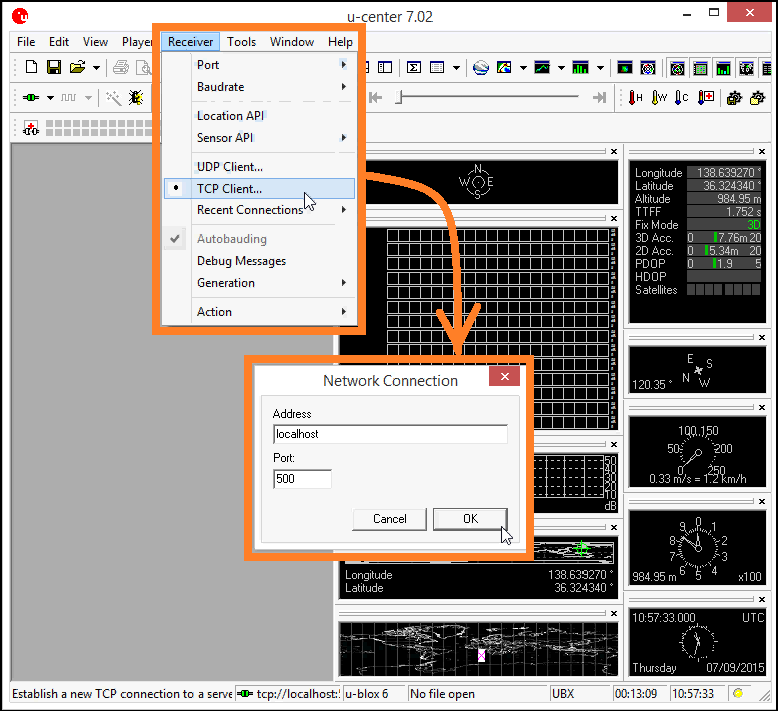
打开 u-center 并选择接收器、TCP 客户端,在网络连接窗口中将地址设为 "localhost",端口设为 "500",然后按确定。
有关如何使用 u-center 上传配置,请参阅下面的说明。
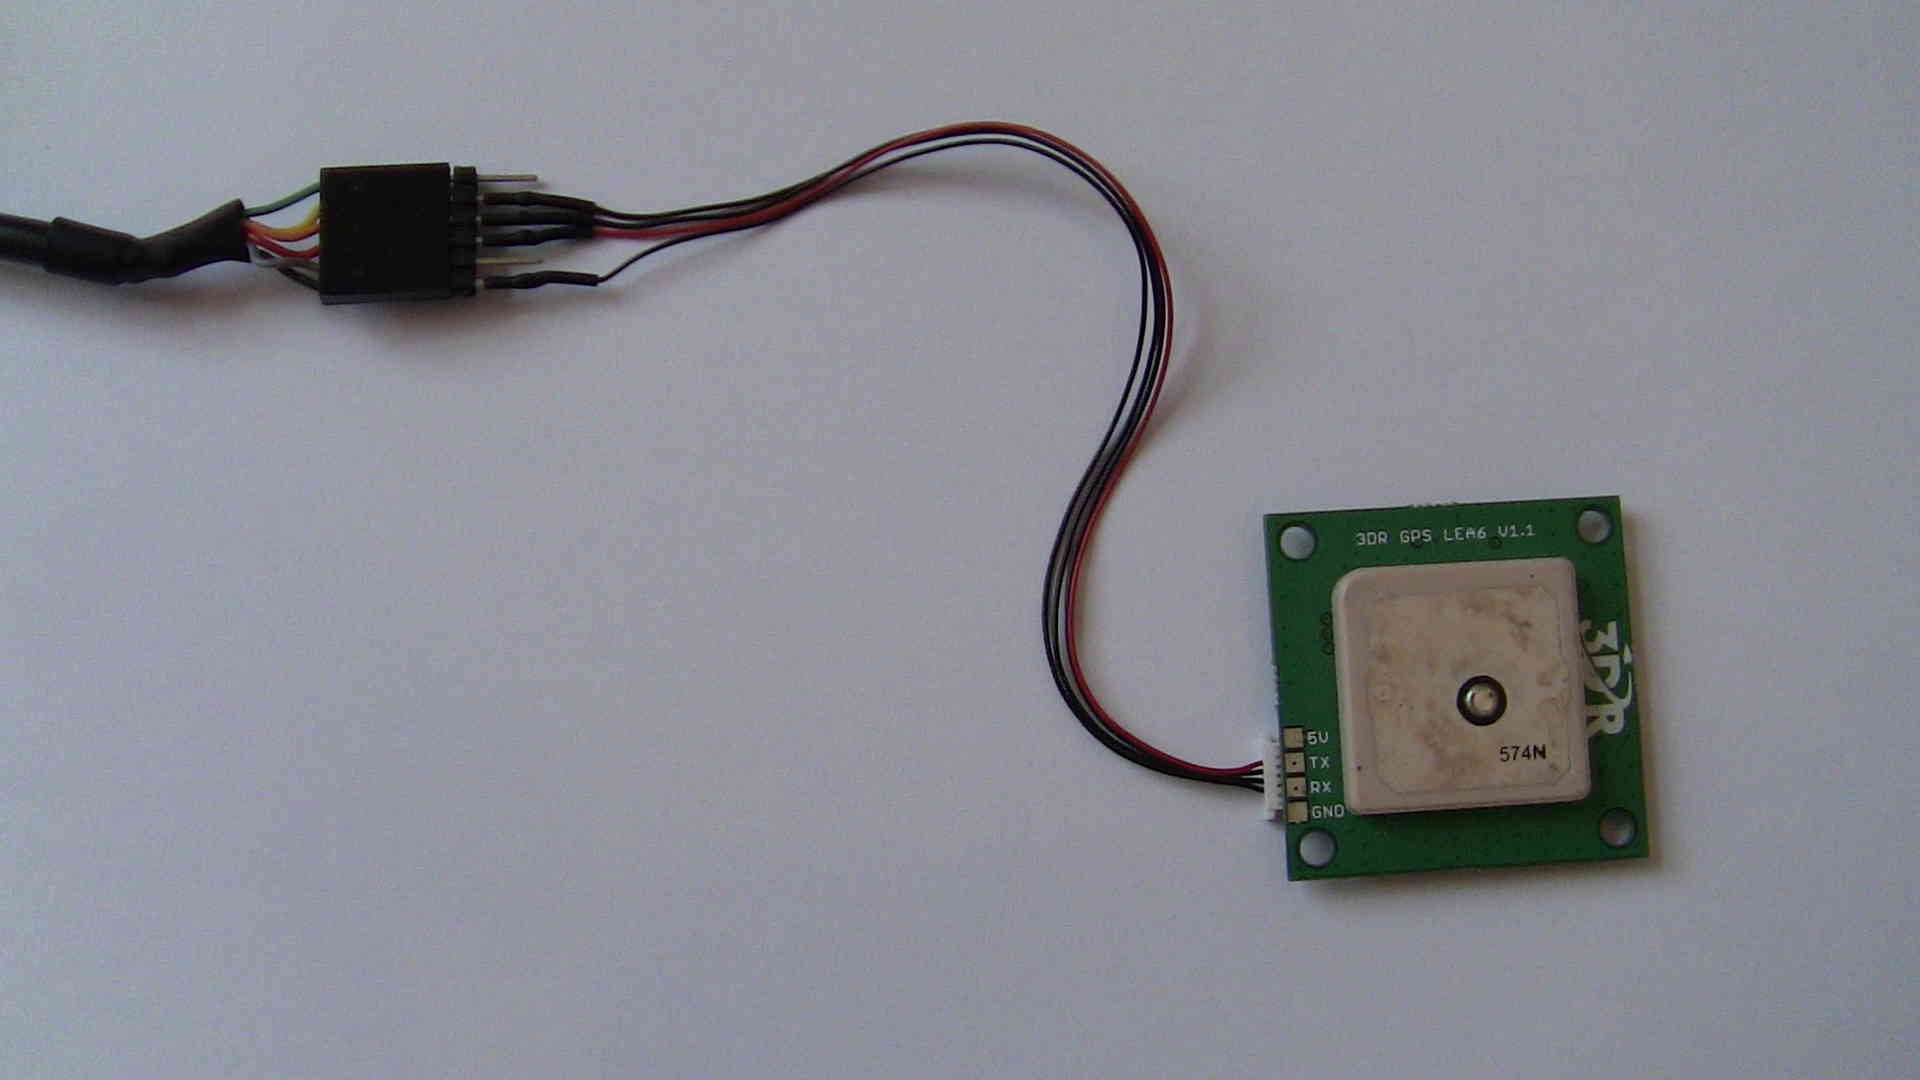
连接选项 #2 - FTDI 电缆
您需要一个 FTDI 电缆 和一个 GPS 适配器电缆 将 GPS 连接到计算机。如果您从未将 FTDI 设备插入计算机,则可能需要下载并安装 虚拟 COM 端口驱动程序.